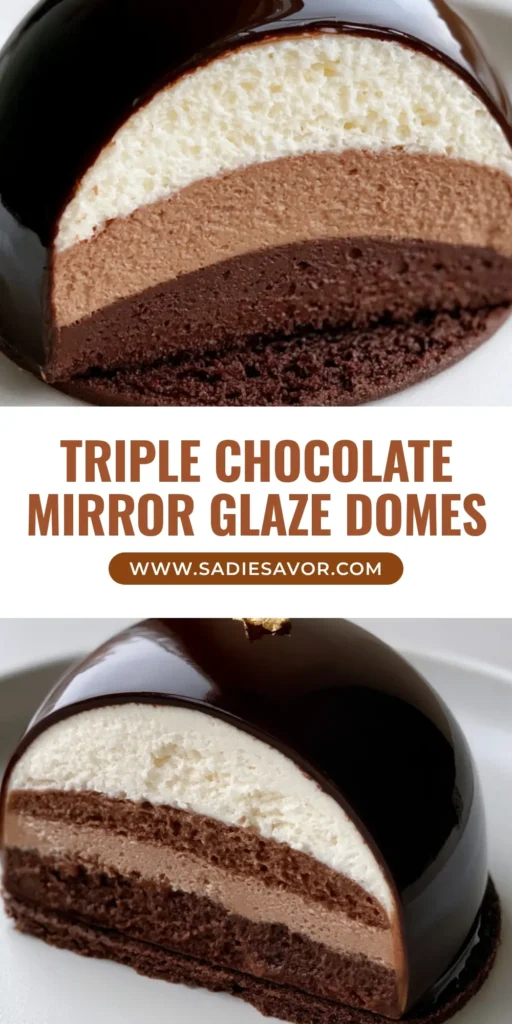
Experience the ultimate patisserie-style dessert right in your own kitchen with these Chocolate Mousse Domes. At first glance, you see a striking, reflective chocolate mirror glaze that shines like a dark gemstone. But the real magic happens when you slice through the center to reveal three perfectly horizontal layers: dark chocolate mousse, milk chocolate mousse, and an airy white chocolate mousse. All of this sits atop a crisp, circular cocoa shortbread biscuit base, finished with a touch of edible gold leaf.
Whether you found this recipe on Pinterest via sadiesavor or you are a seasoned home baker looking for a challenge, these Chocolate Mousse Domes are designed to impress. This isn’t just a recipe; it’s a masterclass in texture and visual design. Unlike a traditional No-Bake Biscoff Cheesecake, which focuses on a singular creamy layer, these domes provide a gradient of cocoa intensity in every single bite.
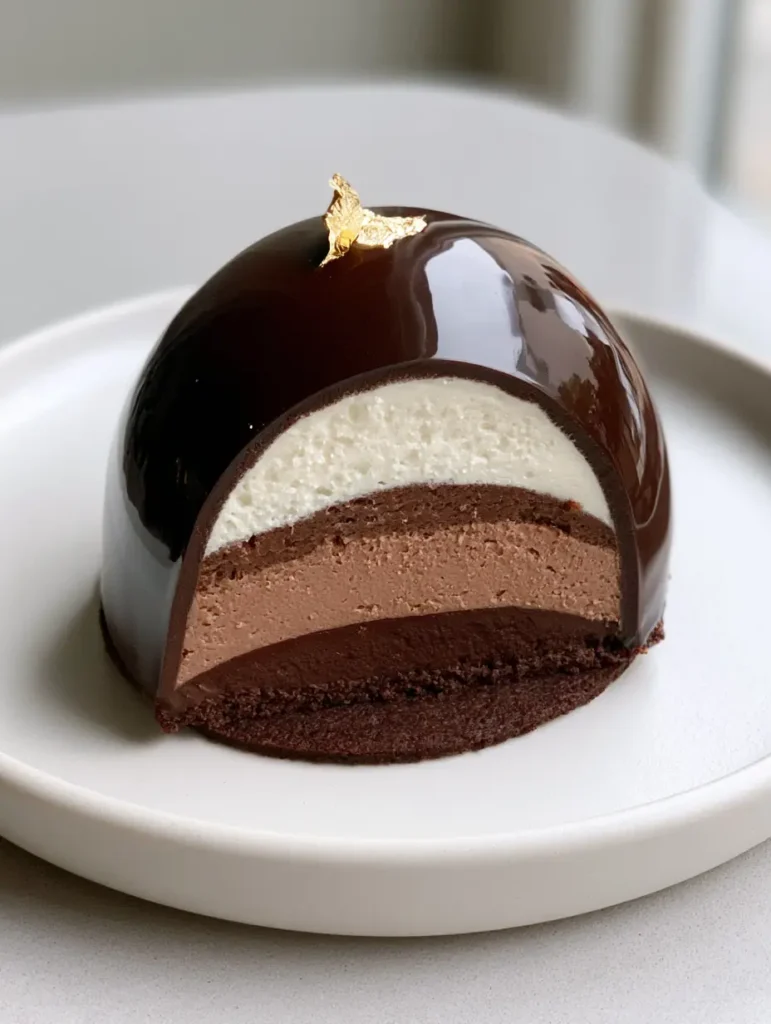
Why This Triple Chocolate Mousse Dome Recipe Works
- Unmatched Visual Appeal: The reflective mirror glaze creates a professional “wow” factor that mimics high-end French pastry shops.
- Textural Harmony: You get the snap of the cocoa shortbread, the silkiness of the glaze, and the melt-in-your-mouth feel of three distinct mousse densities.
- Precision Engineering: By using silicone molds and freezing the layers, we achieve those razor-sharp horizontal lines seen in the Chocolate Mousse Domes.
- Make-Ahead Friendly: These desserts actually benefit from being frozen, making them the perfect stress-free finish for a fancy dinner like Creamy Garlic Smothered Pork Chops.
The Essential Components for Professional Results
To create the perfect Chocolate Mousse Domes, you need quality ingredients that react correctly to temperature. This recipe relies on the science of gelatin and chocolate percentages to ensure the dome holds its shape even after thawing.
The Cocoa Shortbread Biscuit Base
- 1 1/4 cups (155g) All-Purpose Flour: Provides the structure for the base.
- 1/4 cup (25g) High-Quality Cocoa Powder: Gives that deep, dark circular cocoa shortbread biscuit look.
- 1/2 cup (115g) Unsalted Butter, Cold: Essential for a “short” or crumbly texture.
- 1/3 cup (65g) Granulated Sugar: For just enough sweetness to balance the bitter cocoa.
- 1/4 tsp (1.5g) Salt: To sharpen the chocolate flavor profiles.
The Triple Mousse Internal Layers
- Dark Chocolate Mousse Layer: Use 70% cocoa solids for the bottom, most intense layer.
- Milk Chocolate Mousse Layer: Provides the creamy, nostalgic middle ground.
- White Chocolate Mousse Layer: The top, most delicate layer that creates a beautiful contrast.
- Heavy Cream (35% Fat): Whisked to soft peaks to provide the “airy” volume required for Chocolate Mousse Domes.
- Gelatin Sheets (or Powder): The stabilizing agent that keeps the layers distinct and horizontal.
The Reflective Chocolate Mirror Glaze
- 1/2 cup (120ml) Water: The base of the glaze syrup.
- 1 cup (200g) Sugar: Creates the glossy, glass-like finish.
- 3/4 cup (175ml) Sweetened Condensed Milk: The secret to a thick, opaque glaze that covers perfectly.
- 1 cup (175g) Dark Chocolate Chips: Provides the rich, reflective color.
- 3 tsp (10g) Gelatin: Ensures the glaze sets instantly upon hitting the frozen mousse.
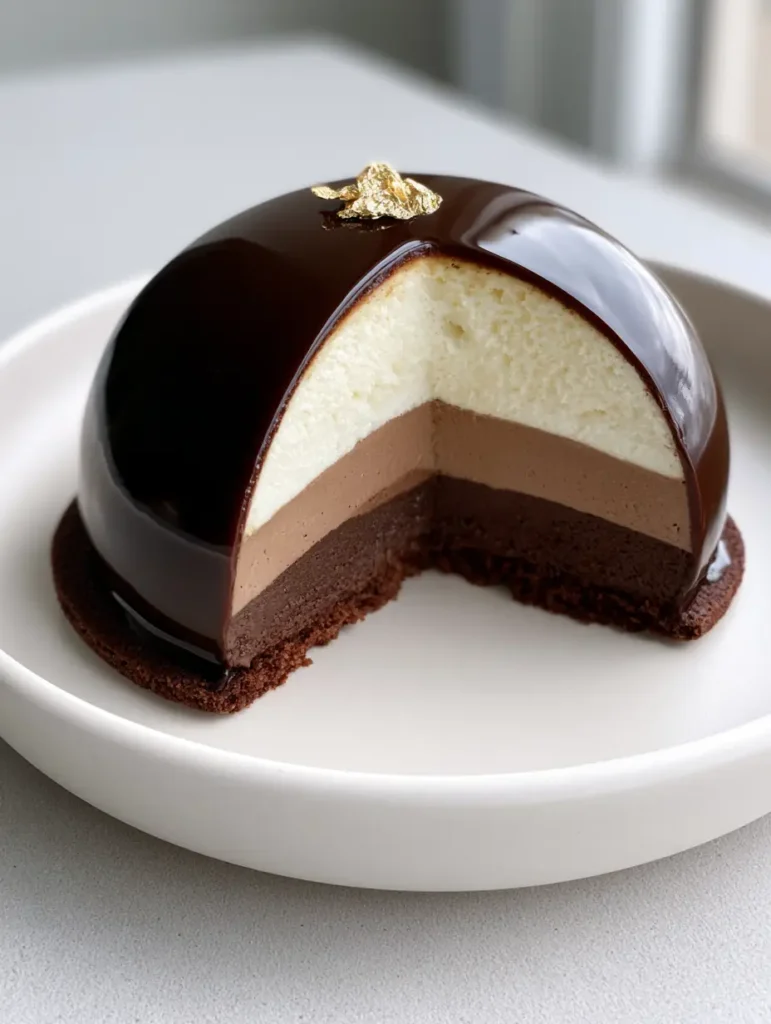
Step-By-Step: Mastering the Chocolate Mousse Domes
Creating these Chocolate Mousse Domes requires patience and a silicone semi-sphere mold. Follow these steps carefully to ensure your internal layers remain perfectly flat and horizontal.
Step 1: The Cocoa Shortbread Base
Preheat your oven to 350°F (175°C). Pulse the flour, cocoa, sugar, and salt in a food processor. Add the cold butter and pulse until a dough forms. Roll it out between two sheets of parchment paper to 1/4 inch (6mm) thickness.
Use a circular cookie cutter that is slightly wider than the base of your dome mold. Bake for 10-12 minutes. These circular cocoa shortbread biscuit bases must be completely cool before assembly. If you love this type of crisp texture, you’ll also enjoy the base of our Lemon Raspberry Cookies.
Step 2: Crafting the White Chocolate Top Layer
Bloom 1 tsp of gelatin in cold water. Melt 1/3 cup (50g) white chocolate. Fold in 1/2 cup (120ml) of lightly whipped cream and the dissolved gelatin. Pour this into the very bottom of your silicone semi-sphere molds, filling them only 1/3 of the way.
Pro Tip: Place the mold in the freezer for 15 minutes to set this layer before adding the next. This ensures the Chocolate Mousse Domes have that crisp horizontal line.
Step 3: The Milk and Dark Chocolate Layers
Repeat the process for the milk chocolate layer, pouring it over the set white mousse. Freeze again. Finally, prepare the dark chocolate mousse and fill the mold to the top. This bottom layer (which will be the base when inverted) provides the structural integrity for the entire dome.
Step 4: The Mirror Glaze Application
Boil the water, sugar, and condensed milk. Remove from heat and stir in the gelatin and dark chocolate. Use an immersion blender to remove all air bubbles. Wait until the glaze reaches 90°F (32°C) before pouring.
Remove your frozen Chocolate Mousse Domes from the molds. Place them on a wire rack. Pour the glaze over them in one fluid motion until perfectly smooth and reflective. The coldness of the mousse will “shock” the glaze into setting immediately.
Expert Tips for a Flawless Finish
- Avoid Bubbles: When blending your mirror glaze, keep the immersion blender fully submerged. Air bubbles are the enemy of a reflective finish.
- Temperature is King: If the glaze is too hot, it will melt your Chocolate Mousse Domes. If it’s too cold, it won’t pour smoothly. 90°F (32°C) is the “sweet spot.”
- The Clean Transfer: Use a small offset spatula to move the glazed dome onto the cocoa biscuit base to keep the edges sharp.
- Garnish with Grace: Use tweezers to apply a tiny piece of edible gold leaf to the top curve. This adds a luxury aesthetic perfect for a Mango Sticky Rice Rolls inspired dessert spread.
How to Store and Serve Your Masterpiece
The Chocolate Mousse Domes should be kept in the refrigerator until about 15 minutes before serving. This allows the internal mousse layers to soften slightly while keeping the glaze firm. They can be stored in an airtight container for up to 3 days. Do not freeze once the glaze has been applied, as it may lose its luster upon thawing.
If you are planning a full menu, these domes are a sophisticated follow-up to a light meal like an Authentic Greek Salad or even a fun Unicorn Lemonade Recipe for a colorful themed party.
Frequently Asked Questions
Absolutely! You can keep the unglazed domes in the freezer for up to two weeks. Just glaze them the day you plan to serve for the best shine.
Yes, you can substitute 1 gelatin sheet for 1 teaspoon of powdered gelatin. Ensure you bloom the powder in cold water before dissolving it into your warm chocolate mixture.
The secret is using an immersion blender to remove air bubbles and ensuring the glaze is poured at exactly 90°F (32°C). The smooth surface of the frozen mousse also helps create that glass-like finish.
Use high-quality couverture chocolate if possible. For the dark layer, 70% cocoa provides the best structural stability and flavor contrast against the sweeter white chocolate layer.
If the layers mixed, the previous layer wasn’t frozen enough. You must freeze each mousse layer for at least 15-20 minutes until the top is firm to the touch before adding the next temperature-controlled layer.
The Ultimate Chocolate Mousse Domes Recipe
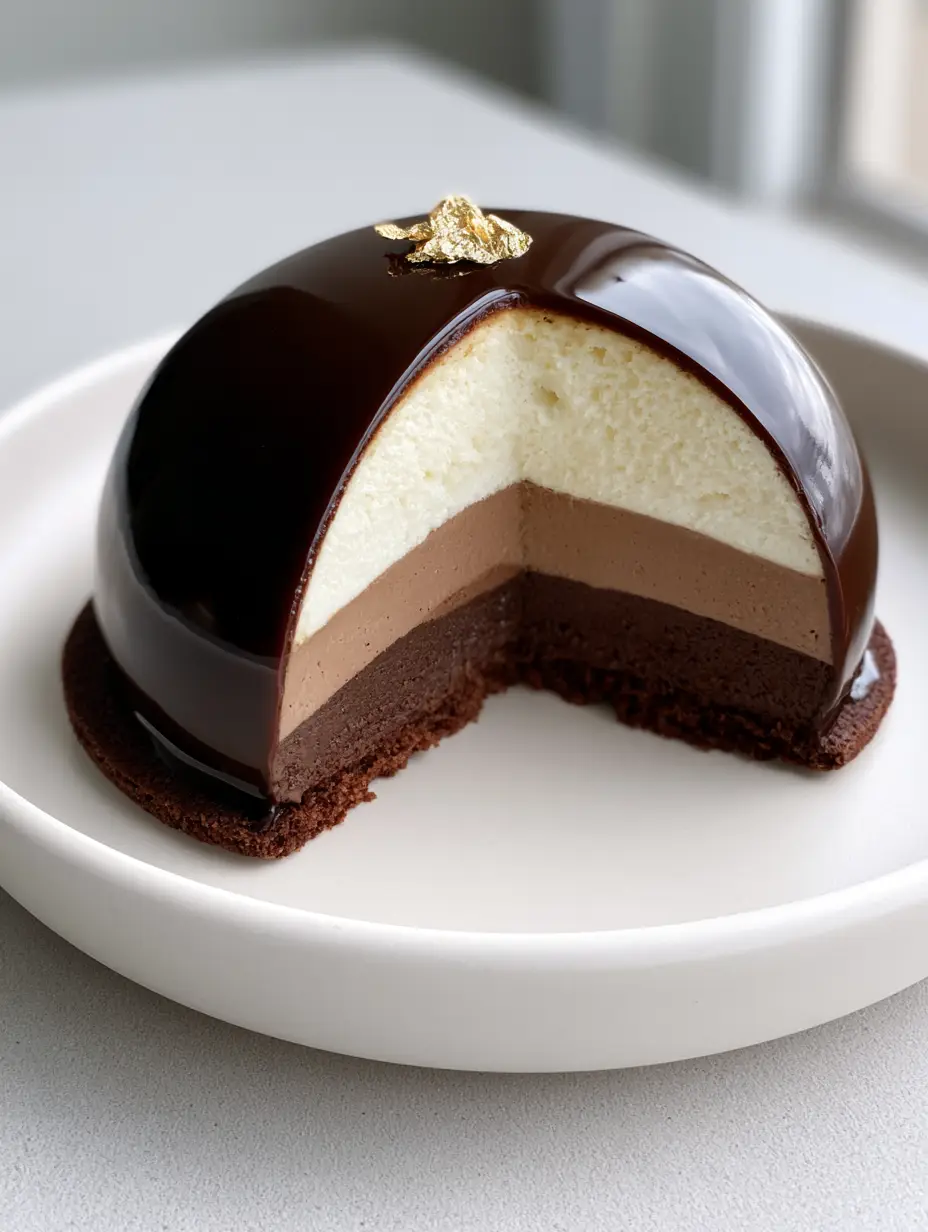
Chocolate Mousse Domes with a Flawless Mirror Glaze and Triple Layers
Ingredients
Equipment
Instructions
- Combine dry ingredients with cold butter to form a dough. Roll to 1/4 inch, cut into circles, and bake at 350°F (175°C) for 12 minutes.
- Fold melted white chocolate and gelatin into whipped cream. Fill 1/3 of the silicone mold and freeze for 15 minutes.
- Repeat the process with milk chocolate, then dark chocolate, freezing between each layer to maintain horizontal lines.
- Boil water, sugar, and condensed milk. Stir in gelatin and chocolate. Blend until smooth. Pour over frozen domes at 90°F (32°C).
- Place glazed domes onto the biscuit base and garnish with a tiny piece of gold leaf.
Notes
Use an immersion blender to remove all bubbles from the mirror glaze for a reflective finish.
Show Off Your Domes!
Did you achieve that perfect mirror finish? We want to see! Save this recipe to your Pinterest dessert board and follow sadiesavor for more high-end pastry secrets. If you made these Chocolate Mousse Domes, leave a 5-star rating below and upload a photo of your sliced layers in the comments!