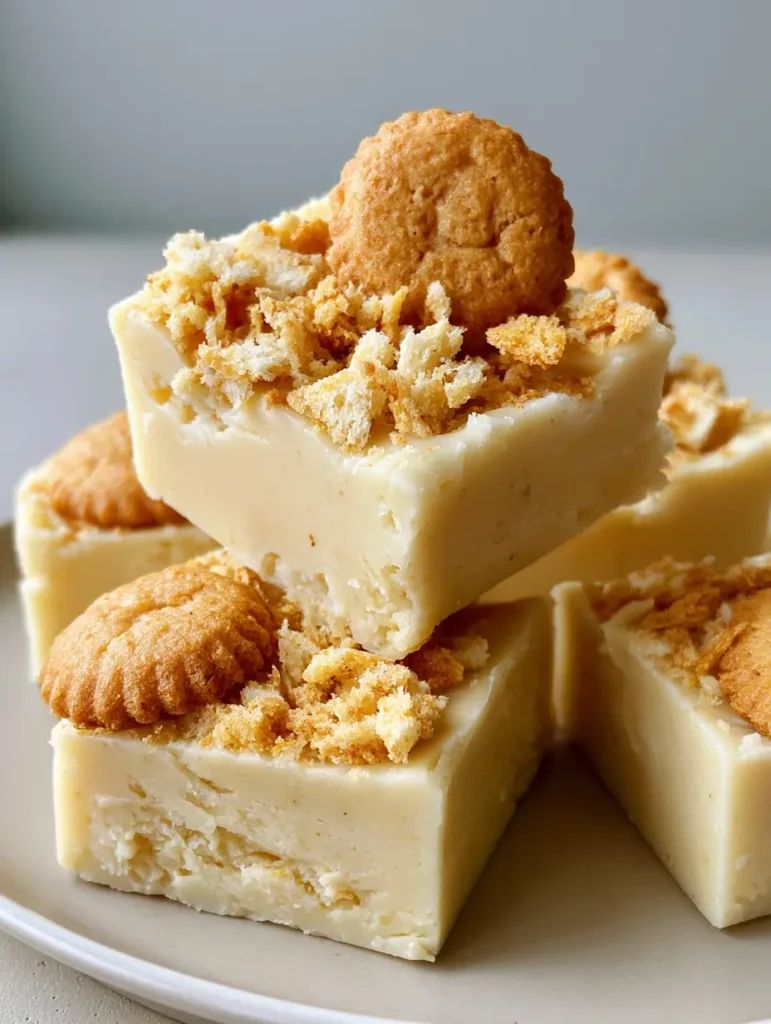
This Banana Pudding Fudge is the ultimate mashup of two nostalgic classics: creamy, old-fashioned fudge and a traditional Southern banana pudding. If you are looking for a dessert that stops the scroll on Pinterest and disappears in minutes at a potluck, you have found it. This recipe captures that iconic creamy pale yellow banana fudge base and pairs it with the crunch of whole vanilla wafer cookies for a treat that is as beautiful as it is delicious.
Making a batch of Banana Pudding Fudge is surprisingly simple, requiring no candy thermometer and only a few minutes of stovetop time. The secret lies in the combination of high-quality white chocolate and instant pudding mix, which provides that unmistakable “nana pudding” flavor we all crave. This recipe is a fantastic follow-up if you’ve already mastered our strawberry banana pudding cake and want something bite-sized.
Why This Banana Pudding Fudge Will Be Your New Favorite Treat
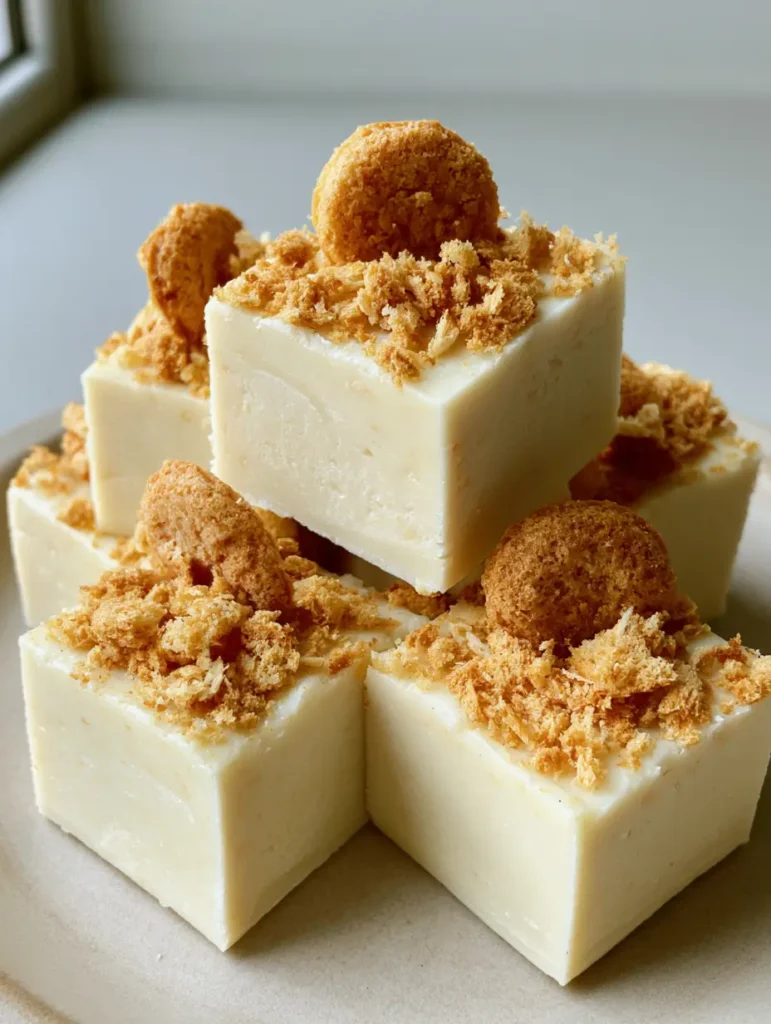
- Perfect Visual Contrast: The smooth, opaque pale yellow color of the fudge creates a stunning backdrop for the golden-brown vanilla wafer cookies.
- Dense, Creamy Texture: Unlike grainy traditional fudges, this version is velvety smooth and holds its clean, sharp-cut edges perfectly.
- No-Bake Simplicity: You don’t need to turn on the oven to achieve professional-grade results.
- Nostalgic Flavor Profile: It tastes exactly like the bottom of a banana pudding bowl where the cookies have softened just enough.
If you love the flavor profile of bananas in your desserts, you might also want to check out our chewy banana bread cookies for your next baking session.
Essential Ingredients for the Best Banana Pudding Fudge
To achieve the dense, uniform texture seen in the photos, you need specific ingredients that balance fat, sugar, and stability. Here is what you will need:
- White Chocolate Chips (3 cups / 510g): This acts as the structural base. Use a high-quality brand with cocoa butter for the smoothest melt.
- Sweetened Condensed Milk (14 oz / 396g): This provides the creamy, fudgy pull and sweetness. Do not confuse this with evaporated milk.
- Instant Banana Cream Pudding Mix (3.4 oz / 96g): This is the “magic” ingredient that gives us the creamy pale yellow hue and concentrated banana flavor.
- Unsalted Butter (2 tbsp / 28g): Adds a professional sheen and a richer mouthfeel to the final square.
- Vanilla Extract (1 tsp / 5ml): Enhances the aromatic profile of the banana and white chocolate.
- Vanilla Wafer Cookies: You will need whole vanilla wafer cookies for the topping and crushed vanilla wafer crumbs for that signature texture.
- Fine Sea Salt (pinch): A tiny amount of salt cuts through the sugar to highlight the fruit notes.
Step-by-Step Instructions for Perfect Banana Fudge
1. Prepare Your Pan for Clean Edges
Line an 8×8 inch (20x20cm) square baking pan with parchment paper, leaving an overhang on two sides. This is the secret to getting those clean, sharp-cut edges. Without the “sling,” you’ll struggle to lift the fudge out, leading to crumbled corners.
2. Melting the Base Gently
In a medium heavy-bottomed saucepan over low heat, combine the 3 cups (510g) white chocolate chips, 14 oz (396g) sweetened condensed milk, and 2 tbsp (28g) butter. Stir constantly with a silicone spatula. Visual Cue: You are looking for a completely smooth, glossy liquid with no visible chips remaining.
3. Incorporating the Banana Flavor
Once melted, whisk in the 3.4 oz (96g) instant banana pudding mix and 1 tsp (5ml) vanilla extract. Stir vigorously until the powder is fully dissolved and the mixture turns that beautiful creamy pale yellow. The mixture will thicken significantly at this stage—this is normal!
For those who enjoy rich, layered desserts, this thickening process is similar to the base of our no-bake Biscoff cheesecake.
4. Setting the Foundation
Pour the hot fudge mixture into your prepared pan. Use an offset spatula to smooth the top into a dense, uniform texture. Work quickly, as the fudge begins to set as it cools.
5. The Signature Topping Strategy
While the fudge is still tacky, press whole vanilla wafer cookies into the surface in a grid pattern (usually 4×4 or 5×5). Between the cookies, sprinkle a generous sprinkling of coarse vanilla wafer crumbs. Press down very lightly to ensure the crumbs adhere to the fudge base.
6. The Chilling Phase
Allow the fudge to cool at room temperature for 30 minutes, then transfer to the refrigerator for at least 4 hours (or overnight). This long chill time is vital for achieving those clean, sharp-cut edges when you finally slice into it.
Expert Tips for Fudge Success
- Avoid Overheating: White chocolate is notorious for “seizing” or turning oily if it gets too hot. Keep your flame at the lowest setting or use a double boiler.
- Sift the Pudding Mix: If your pudding mix has hard clumps, sift it before adding it to the chocolate to ensure a smooth, creamy, opaque finish.
- The Hot Knife Trick: To get the professional look from the Midjourney prompt, dip a sharp chef’s knife in hot water and wipe it dry between every single cut.
- Texture Variation: If you want even more crunch, fold 1/2 cup of crushed wafers directly into the fudge before pouring it into the pan.
If you’re in the mood for something with a different flavor profile but the same decadence, try our hot fudge brownie cheesecake.
Storage and Freezing Guide
To Store: Keep your Banana Pudding Fudge in an airtight container in the refrigerator for up to 2 weeks. Place parchment paper between layers to prevent the cookies from sticking.
To Freeze: This fudge freezes beautifully! Wrap individual squares in plastic wrap and place them in a freezer-safe bag for up to 3 months. Thaw in the fridge for a few hours before serving to maintain that dense, uniform texture.
What to Serve With Banana Pudding Fudge
Because this fudge is incredibly sweet and rich, it pairs best with items that offer a bit of contrast. Serve it alongside a platter of fresh strawberries or tart green apple slices. For a beverage pairing, a cold glass of milk or a strong, bitter espresso balances the creamy sweetness perfectly.
Frequently Asked Questions
It is not recommended. Fresh bananas add too much moisture, which will prevent the white chocolate from setting into a dense, firm fudge. The instant pudding mix provides the flavor and color without compromising the texture.
Yes, sweetened condensed milk is essential for this recipe. It provides the necessary sugar and protein structure to create a ‘quick fudge’ that sets properly without a candy thermometer.
First, ensure the fudge is fully chilled for at least 4 hours. Second, use a long, sharp chef’s knife dipped in hot water and wiped dry before each slice.
While it can sit out for a few hours at a party, it is best kept refrigerated. The vanilla wafers on top can soften over time if left in a humid environment.
This usually happens if the white chocolate was overheated. White chocolate is sensitive; always melt it on the lowest heat setting possible and stir constantly to keep the emulsion stable.
The Official Banana Pudding Fudge Recipe Card
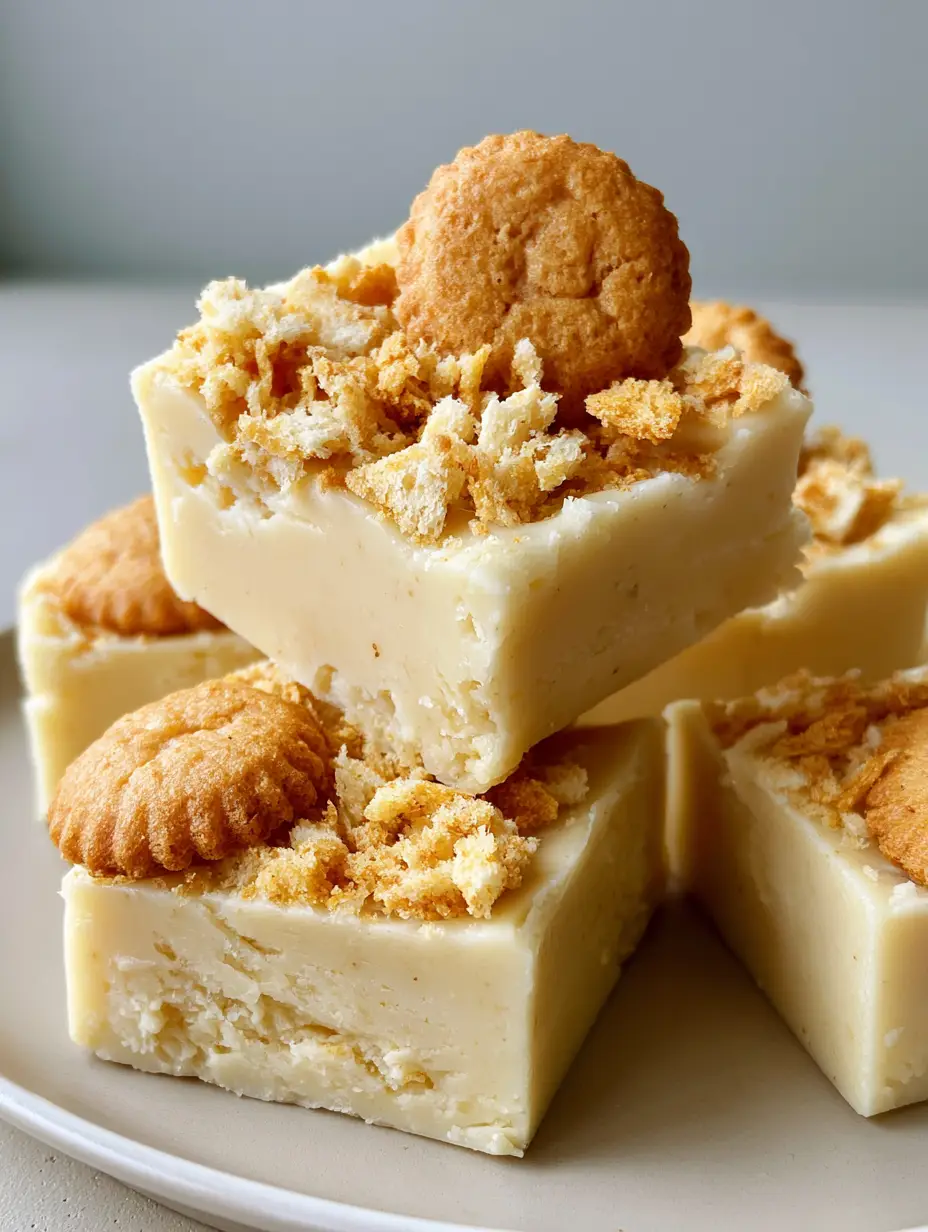
Banana Pudding Fudge with Vanilla Wafers: Easy No-Bake Recipe
Ingredients
Equipment
Instructions
- Line an 8x8 inch baking pan with parchment paper, ensuring there is an overhang on the sides for easy removal.
- In a medium saucepan over low heat, combine white chocolate chips, sweetened condensed milk, and butter. Stir constantly until smooth and glossy.
- Remove from heat and whisk in the instant banana pudding mix, vanilla extract, and salt until the mixture is a uniform pale yellow and no lumps remain.
- Pour the mixture into the prepared pan and smooth the top. Press whole vanilla wafers into the top in a grid and sprinkle with wafer crumbs.
- Refrigerate for at least 4 hours before lifting from the pan and slicing into clean squares with a sharp knife.
Notes
Ensure the pudding mix is 'Instant' and not 'Cook & Serve'.
Join the SadieSavor Community!
We hope you absolutely love this Banana Pudding Fudge! It is a showstopper that brings a bit of Southern charm to any dessert table. If you make this, please save this recipe to your Pinterest “Dessert” board so you never lose it!
Did you get those perfect sharp-cut edges? Snap a photo and share it in the comments below or tag @sadiesavor on social media. We love seeing your kitchen wins! Don’t forget to leave a 5-star rating in the recipe card above to help other home cooks find this delicious treat.